QGIS Polygons
and Signs Plugin
Assign street signs to geometry in seconds. No scripts, no confusion—just visual logic in your QGIS map.

smart workflows for
real-world streets
Made for urban teams who need fast, visual, and error-free assignments.
Accelerates zoning tasks
Quickly link signage to street segments—no manual matching, no database juggling.
Works with your data
Drag & drop your existing GeoJSON layers. No need to reformat or prepare schemas.
Intuitive for non-developers
Built for planners, not programmers. All actions happen visually in the QGIS map.
Instant visual feedback
See exactly which signs are connected. Colors and tables update in real time as you work.
Built for city-scale complexity
Easily handle hundreds of segments and thousands of signs—without performance loss.
quick guide
QGIS Polygon and Signs Plugin helps you visually assign traffic signs to road segments. No scripts, no spreadsheets – just maps.
install the plugin in QGIS
Open QGIS
Go to Plugins → Manage and Install Plugins → Install from ZIP

Select the ZIP file you downloaded:
assign-viewer-main.zipOnce installed, the plugin will appear under:
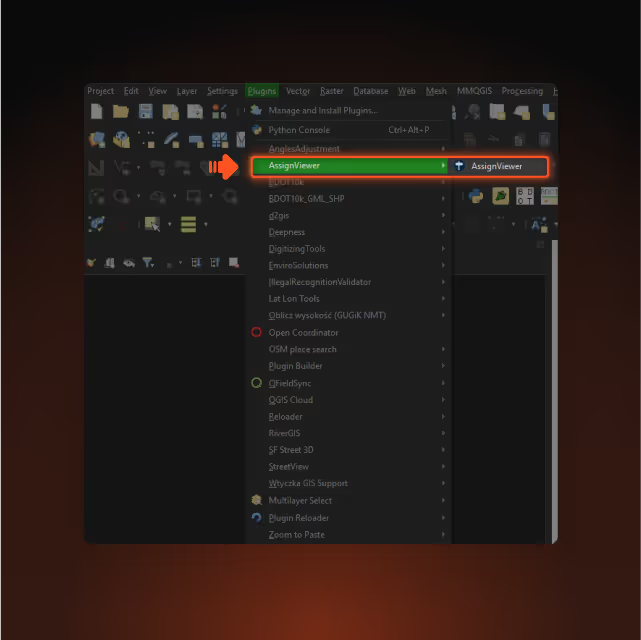
You’re ready to start.
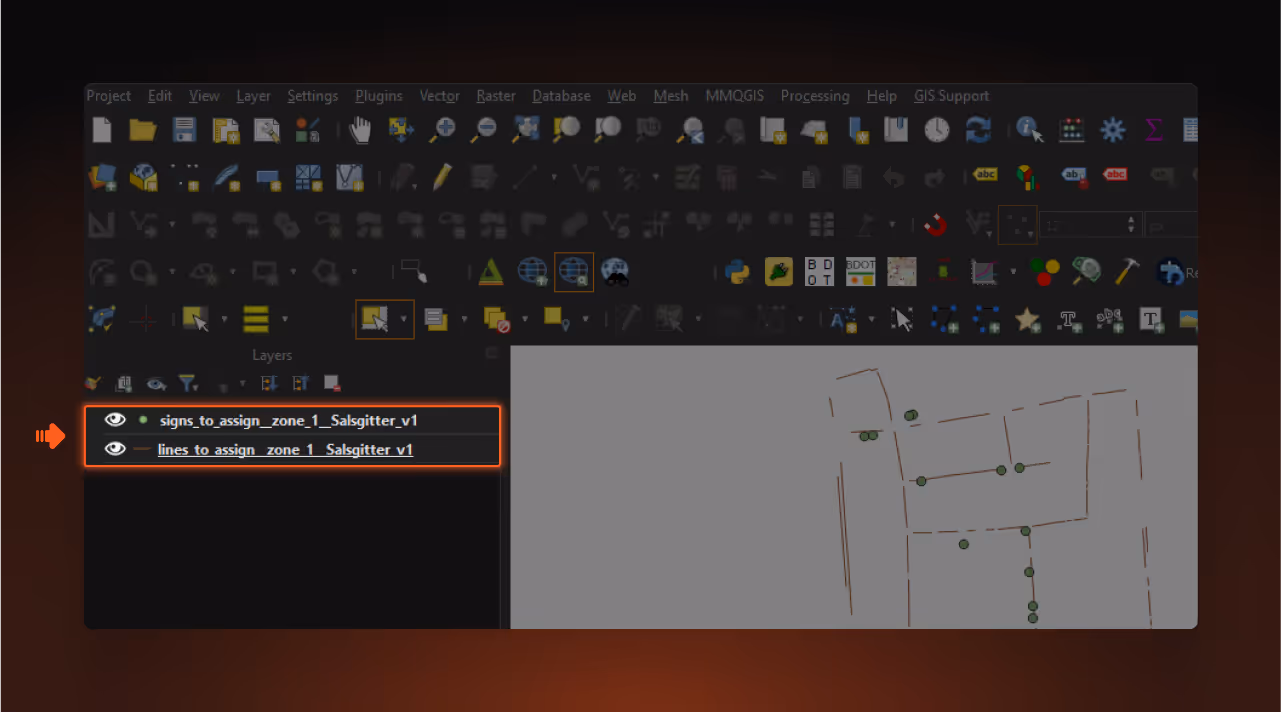
load your data layers
You need two layers:
line_layer– parking baselinespoint_layer– traffic signs
You can simply drag & drop your GeoJSON files into QGIS.
Once loaded, you’re ready to assign.
example files:
using plugin
select input layers
In the plugin window, choose:
- your
line layer(parking baselines) - your
sign layer(traffic signs)
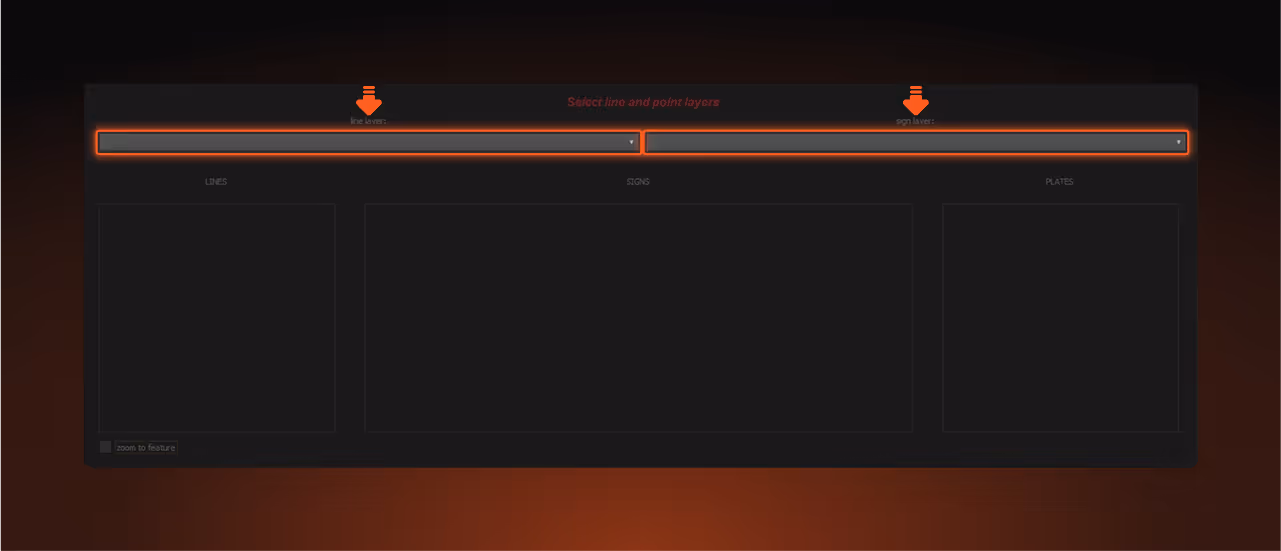
You’ll immediately see visual feedback on the map:
⚫️ gray signs— not assigned🔵 colored signs— already assigned▬ black lines— not assigned▬ blue lines— have one or more signs assigned
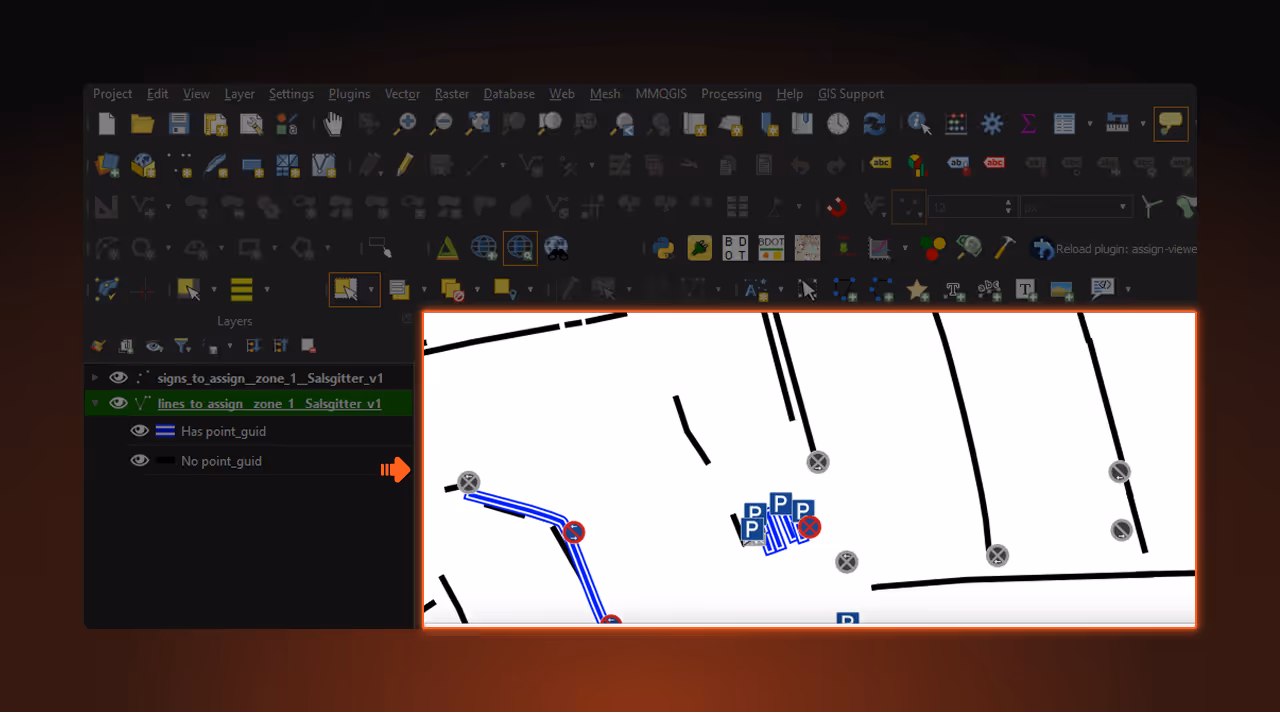
select lines in QGIS
To work with specific road segments or parking lines, follow these steps:
Select the
line_layerIn the Layers panel, make sure the
line_layer(parking baselines) is selected and active.Use the selection tool
Click the Select Features tool in QGIS (rectangle, polygon, etc.).
You’ll find it in the top toolbar or under View → Select → Select Features.Select lines on the map
Now click or drag on the map to select one or more line features.
- The selected lines will appear in the LINES table in the plugin.
- At this point, only the
LINEStable is populated.
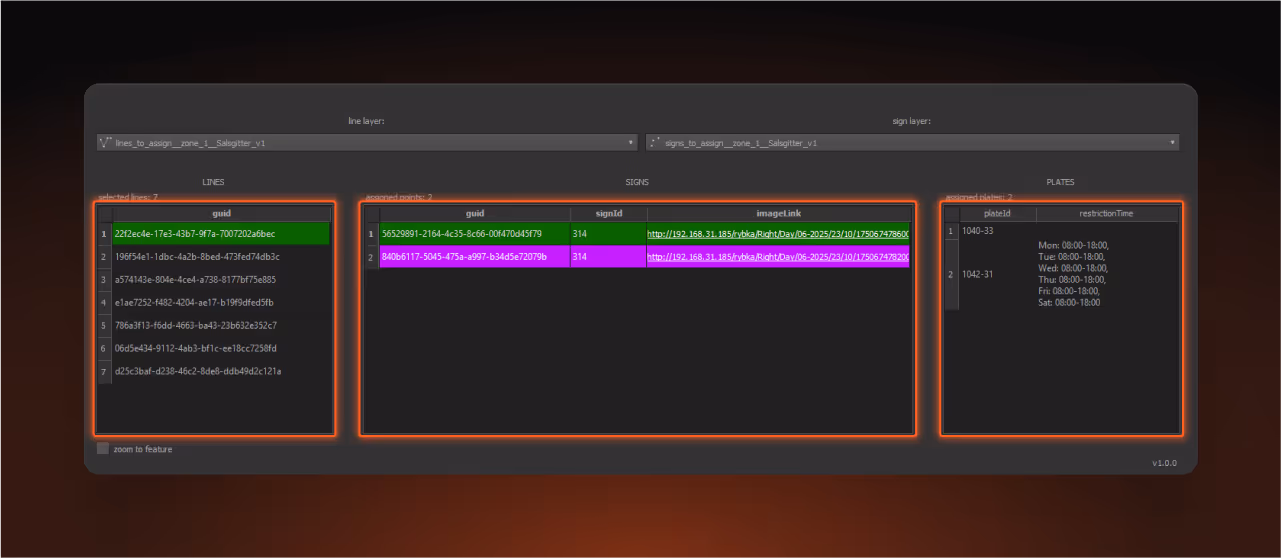
Click a line in the
LINEStable to see its signs and plates.When you do:
- The
SIGNStable will show the signs connected to that line - The
PLATEStable (if data exists) will show restriction details linked to the selected sign
select a line and view its signs
Once you click on a line in the LINES table, the plugin will display all related data:
The
SIGNSTable shows signs assigned to that line (from the point_layer), including:guid– unique identifiersignId– code of the signimageLink– link to a photo
On the map, you’ll see:
- The selected line as a
green line - Assigned signs as
purple markers - The currently selected sign as a
green marker
- The selected line as a
If plate data exists for the selected sign, the
PLATEStable will also display:plateId– plate referencerestrictionTime– any associated time limits or conditions
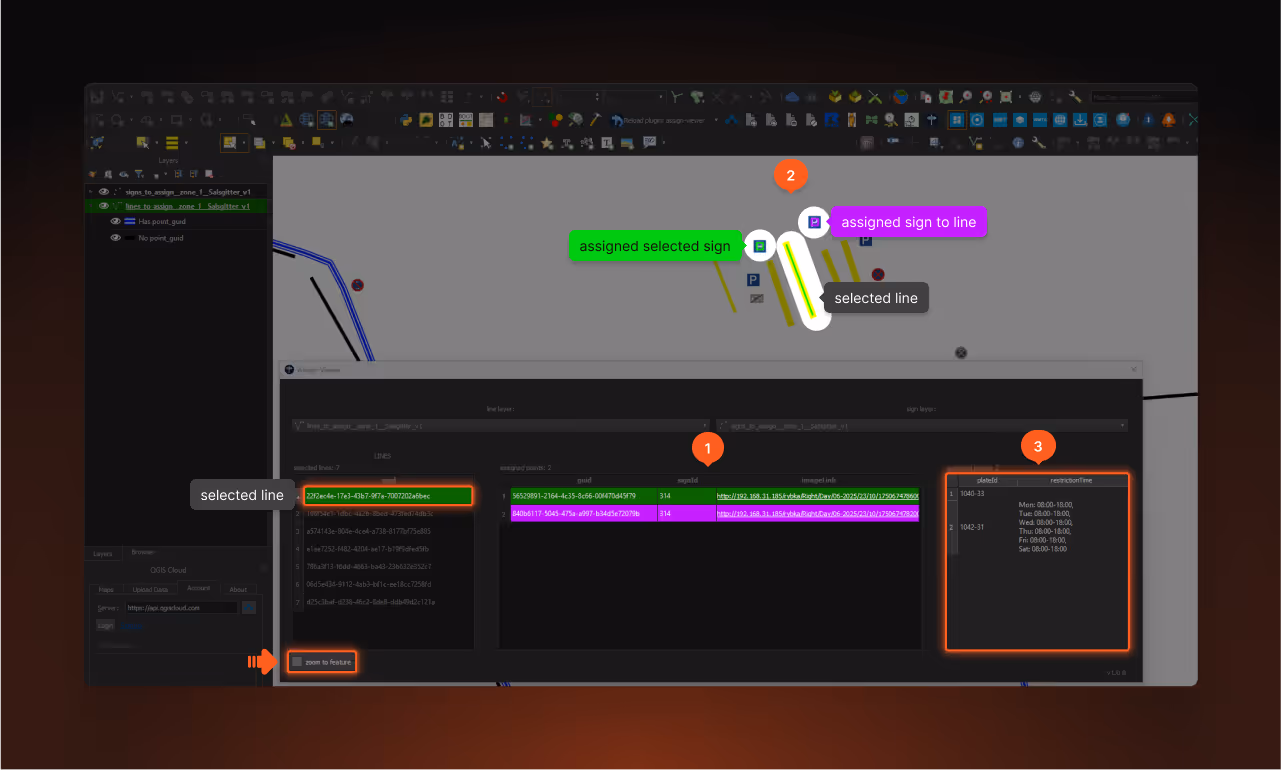
Tip: Use Zoom to feature to instantly focus the map view on the selected line.
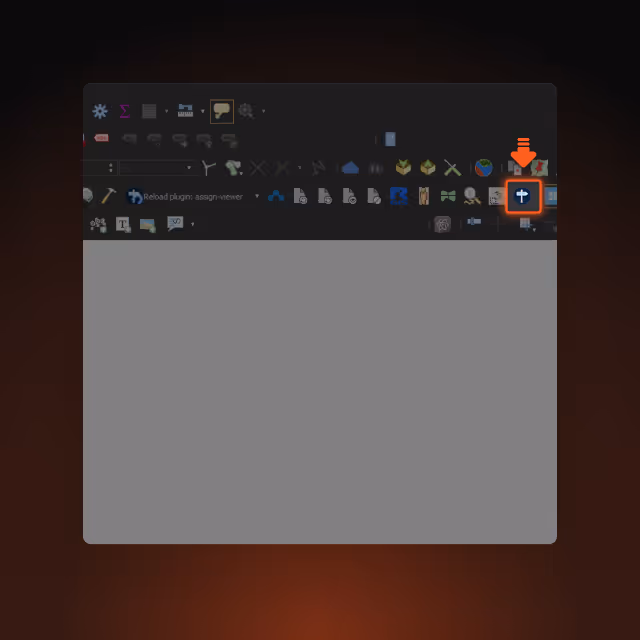
access the plugin
No accounts. No spam. Just clean tools — and mutual respect.
license.txt
No paywalls. No traps.
Just play nice with our code.
1. Usage
The user is allowed to install and use the plugin for any purpose, including private and commercial use, free of charge.
2. Redistribution
Copying, sharing, selling, or redistributing the plugin, in whole or in part, in any form, without the prior written consent of the author, is strictly prohibited.
3. Modifications
Modifying the code or creating derivative works of the plugin without the author’s consent is prohibited.
4. Ownership
The plugin remains the property of DotConnect sp. z o.o., based in Łódź, Poland.